

It’s easy to declutter the house of all your children’s masterpieces without tossing them out altogether. Here’s how to use them to create a personalized art book.
If you’re like many families with kids, you’ve got oodles of arts and crafts created by your child scattered all over the house. You’re itching to declutter, but you don’t want to just toss everything into the trash—after all, your kiddo spent countless hours on these masterpieces! There’s a great solution that not only cleans up your living space but is also a great way to surprise the grandparents. We’re talking about creating a personalized children’s book so you can consolidate and preserve all these beloved works of art and have something you can cherish for years to come.
The organizing guru Marie Kondo wrote in her groundbreaking book The Life-Changing Magic of Tidying Up: "Can you truthfully say that you treasure something buried so deeply in a closet or drawer that you have forgotten its existence? If things had feelings, they would certainly not be happy. Free them from the prison to which you have relegated them." It’s probably safe to say that all those stacks of art accumulating in your home are deeply unhappy. Fortunately, Plum Print founders Carolyn Lanzetta and Meg Ragland feel your pain. After Lanzetta spent tons of time making a keepsake book of her child’s artwork by herself, something occurred to her: There were likely many, many other parents like her who wanted to turn their kids’ art into a book—but didn’t have the time and/or creative expertise to do it. Voila, Plum Print was born, and now this unexpected approach to store kids art has become a hot trend.

Here's how to turn your kid’s art into a book:
Once you sign up, you receive a 22” x 14” x 4” box that you can fill with almost anything, including art, photos, crafts, and figurines. You send the box back to the Plum Print studio using a handy prepaid FedEx shipping label, and they professionally photographe each item.

After each image is edited (removing wrinkles, etc.), a Plum Print graphic designer will draft a layout to send to you for your input. You get to collaborate with them to tweak it to your liking, so the end result is a perfectly customized, one-of-a-kind art book with glossy pages. You’ll still have that sense of having been involved in the creation of the book, without having done the heavy lifting (well, except maybe sending out the box!) Life-changing, right?

What happens to your stuff after that, you ask? For most customers, especially repeat customers, Plum Print sends the materials to “Art Heaven.” If you just can’t bid farewell to your artwork forever, you can request that the materials be returned to you after your book is completed for a return fee. And as an extra bonus, Plum Print is happy to supply you with a link to your professional, edited, high resolution images, free of charge!
How to Take a Walk Down Memory Lane, Plum Print-Style
If you’re inspired to get started, check out these best practices according to Becky Johnson, Plum Print’s Book Production Manager.

Give yourself enough time
Place an order at least six weeks before you actually need the book. It typically takes four to six weeks to produce the book from start to finish, but you’ll also want to build in time for yourself to sort and organize what you want to send in the handy Plum Print box. (N.B. Let Plum Print know asap if you need your book completed by a certain date, so they can put your order on rush, if necessary.)

Decide on a theme
Before you roll up your sleeves and start sorting, consider how you envision the book being organized. Do you want to divide it by school year? Or art genre? Perhaps you want to highlight only “Daddy and Me” pictures for Father’s Day. Of course, you could consider these books as an ongoing project, like Melanie Simone, mom of two and Instagram influencer sincerelyyourssimone. “I will continue to create these books for the next few years, so we have something to look back on from their time in primary school. The first one I did for my son was pre-kindergarten, and I’ll do kindergarten, grade 1 and so on.”

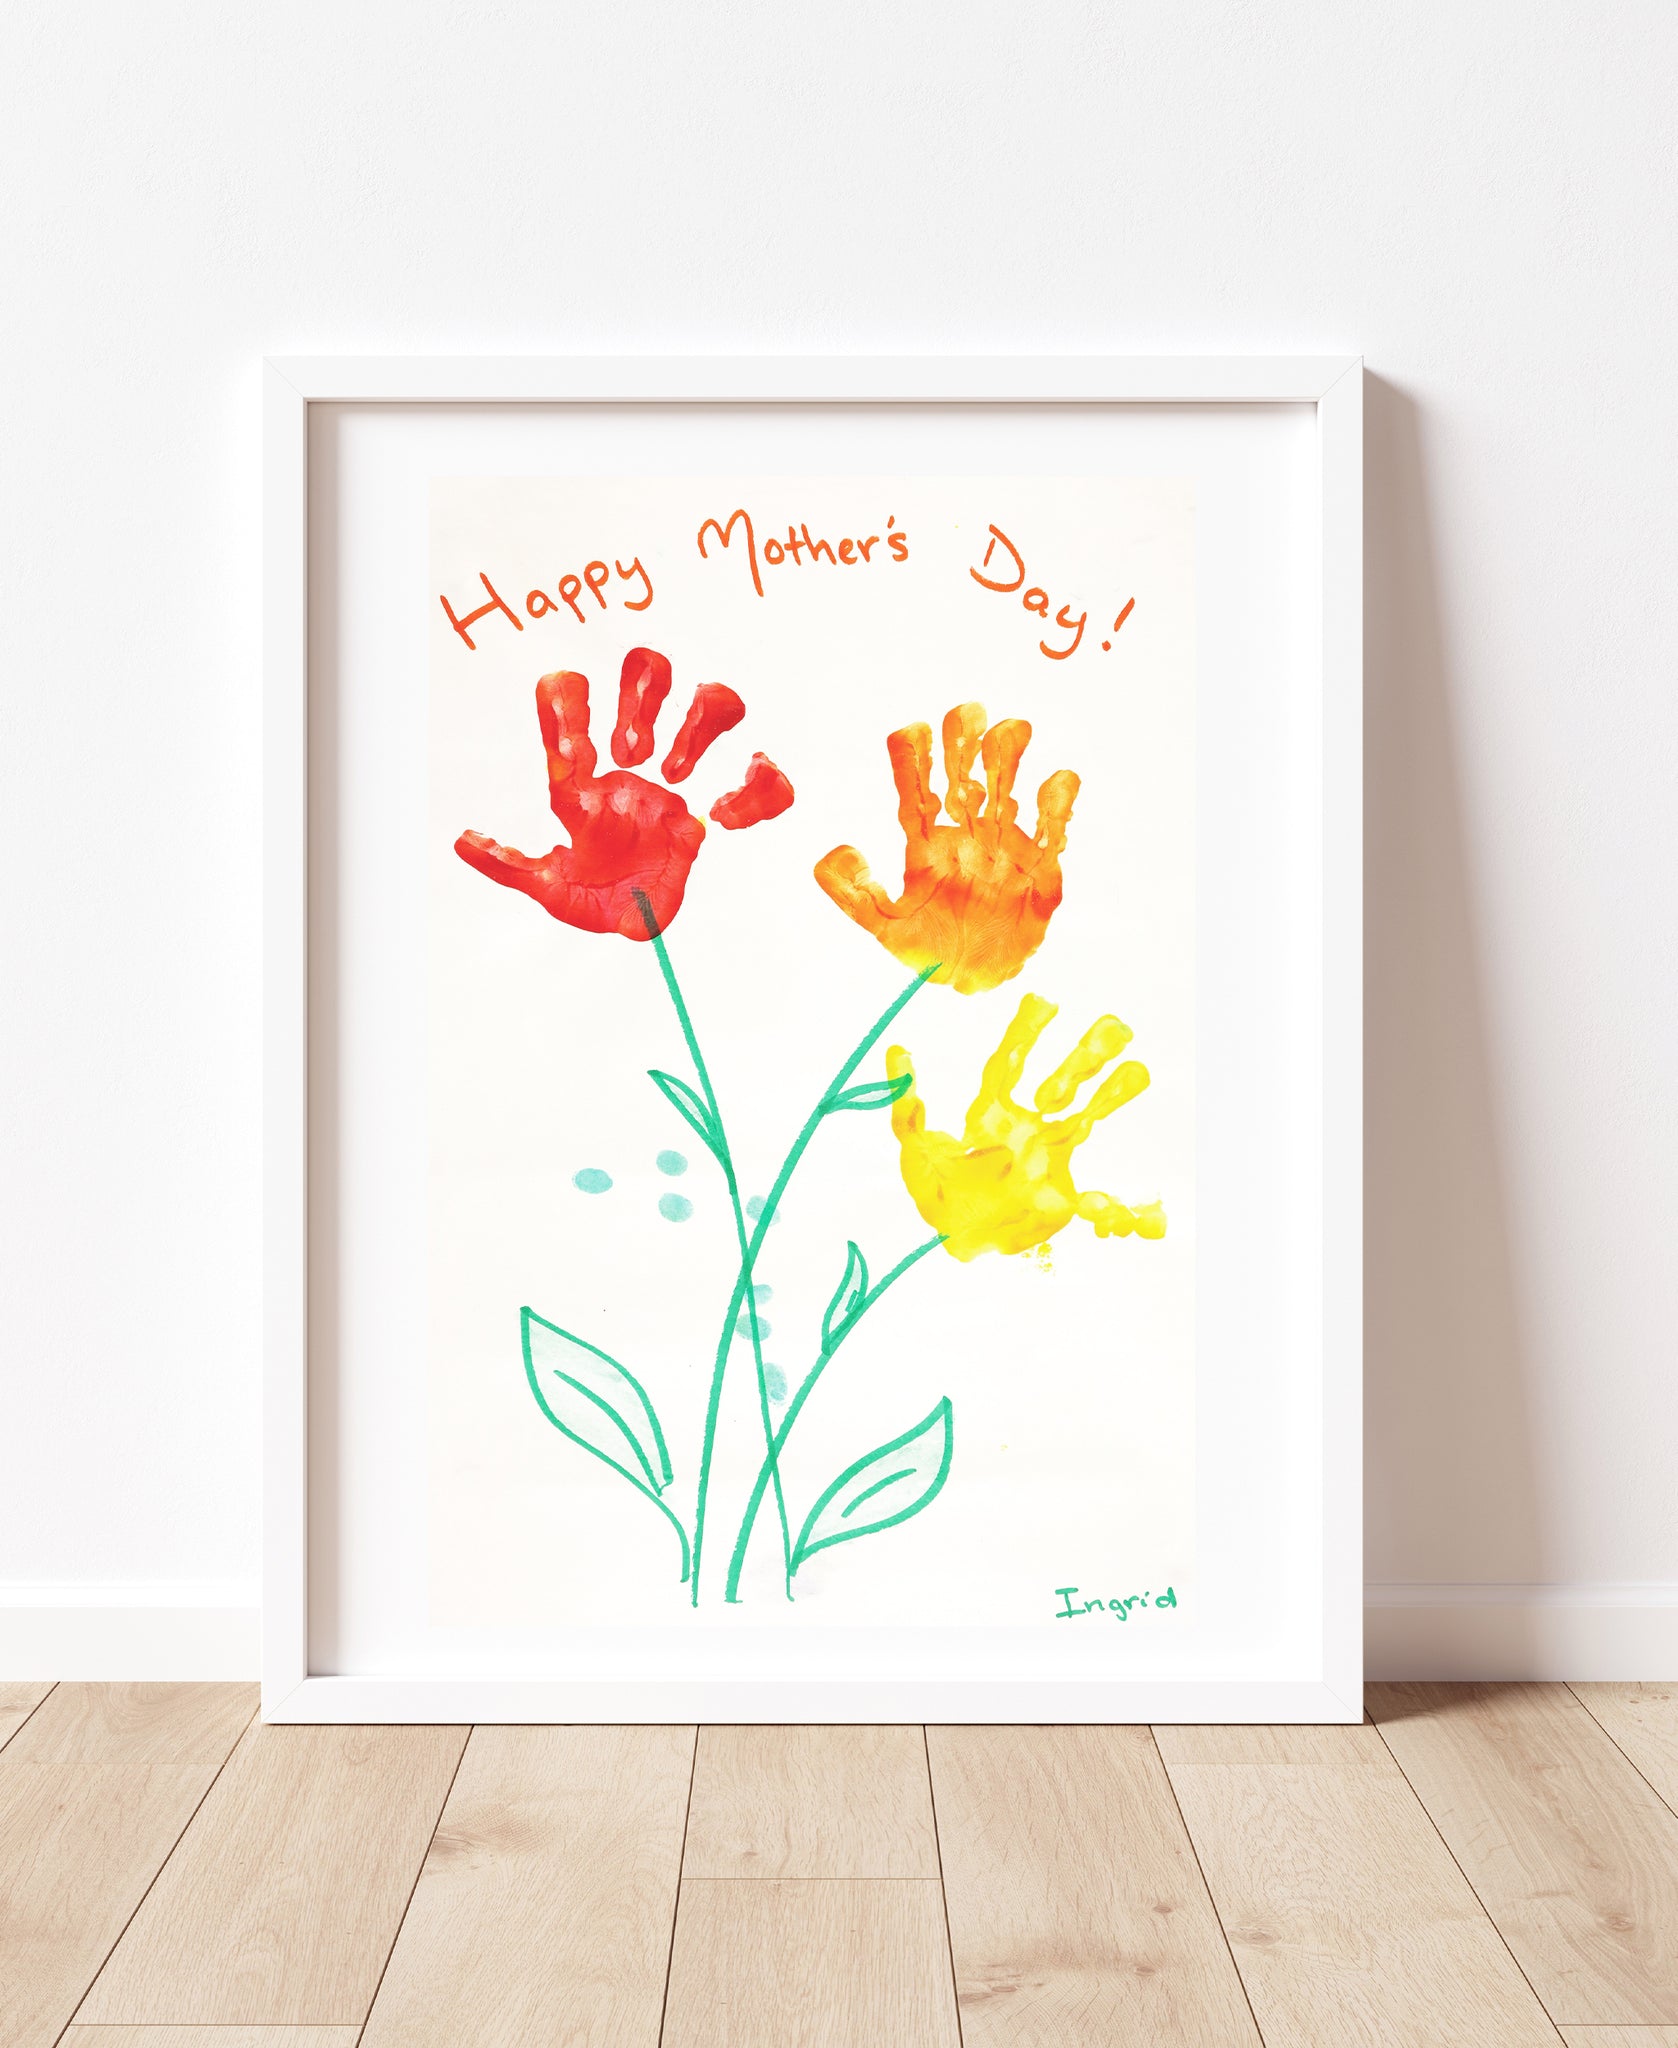
Whittle down your favorite masterpieces
It can be hard to decide which items to put in the book, especially because there are so many pieces of your child’s artwork. “I tried sticking to the ones that I could tell a lot of effort went into or that were meaningful, like handprints or anything for Mother’s Day,” Simone says. You can also include your child by asking for their input on which pieces should be memorialized. Aim for least 20 of them if you don’t want any blank pages, as books are printed with a minimum of 20 pages. If you’ve got way more than that, no worries—Plum Print can fit up to 350 pieces in a book. After the 350 mark, they move on to volume two.

Don’t feel restricted to 2-D art
You really can send just about anything that’s meaningful to you. “It’s been cool to see the different kinds of books that have been made,” Johnson says. “We’ve branched out into other things, like precious letters from World War 2, handwritten recipes from grandma, sports trophies, medals, swimming and horse ribbons, trinkets, and so on.”

Curate your selection
If you’d like the pictures of your artwork to appear in a certain order in the book, number the backs of the items. Things can get shuffled around in the box during shipping so it may not be as obvious to your Plum Print designer how you want things arranged. Keep in mind that some pages may present two to three photos together; if any piece of art is important and you’d like it to get its own page, you’ll want to specify that instruction to your designer.

Book size matters
Where will you keep your book? The answer to that will determine what size you should choose. The more petite size (10” x 8”) will fit most bookshelves; the larger one (13” x 11”) makes a sweet coffee table statement piece. Make your selection accordingly!

Consider the cover
As you gather your materials together for the box, think about which one might be best to be featured on the cover, and what the title of your book should be. Just can’t decide? “Our designers are happy to pick an image for you,” Johnson says.

Come up with your captions
Even though you know now what grade your child was in when they created a certain piece of art, in the future their early years may run together in your mind. So you’ll want to label your artworks in some way. You can go simple with just a date, or be more descriptive about the art, or both. You could even ask your child what they might name each one, or how they’d describe it, and use what comes from the artiste themselves!

Say your goodbyes
“I felt like I was sending away my heart when I mailed the box!” Simone recalls. “But I had faith the items wouldn't be lost by FedEx and remembered that this book would be so special and easier to store and look back on as they grow.”
Pack everything in the provided resealable bag, which will protect your items. Roll—don’t fold—larger pieces. Be sure to fill out the Art Submission Form in the box, close it up and seal it with the three purple stickers provided. Johnson recommends securing your box further with some packing tape. Then drop your box at any FedEx location, (which now includes all Walgreens).
Eek! If your child comes home with something else adorable that you want to include after you’ve sent your box, don’t panic! Take a high-resolution image of it, in even light, on a white background, and send it to Plum Print.
Make the Most of Your Plum Print Collaboration
Now comes the really fun part—working with a Plum Print graphic designer. This direct correspondence is what sets Plum Print apart. Your designer will place your artwork into a layout and send you a proof to review, and you can request revisions, if needed. Johnson says her team is happy to complete as many rounds of revisions as possible to ensure a happy customer. “We want people to absolutely love their art books!” In order to get your creative juices flowing as you collaborate, here are some of Johnson’s tips.

Be creative with your backgrounds
You can choose a solid color or opt for a more layered look by choosing something with more interest to use as a background. For example, Johnson recalls how one customer used watercolor paintings for the background. She cautions that this doesn’t always work; the images of your artwork against certain kinds of backgrounds can look a little busy. But not to worry—your graphic designer will help guide you in case what you chose doesn’t quite work.

Have fun with fonts
There are tons of them to choose from, so play around to see what you like best. Don’t overdo it with too many styles—after all, the artwork itself is the focal point of your book so you don’t want to distract from them. But you might consider choosing one style for the cover and another for your captions. Note, for a small fee, you can include section titles and chapters, which gives you the opportunity to incorporate an additional font if you so choose.

Play with image scales
The default design option for layouts is three pieces of artwork for every two pages, but you can also go for a streamlined look and request one per page. Varying the photo sizes will give it a playful, dynamic vibe, which is something to keep in mind if you expect little ones to flip through and enjoy it.

Cherish the results of your work
“The best part was giving the book to my son and seeing his expression while looking through his work,” Simone says of her experience. “He shared what he remembered about the time he made it. There was pride on his face! And he laughed about how he used to draw when he was younger. He now shares it with his little sister and shows her the art he created. It's a beautiful thing for all of us to enjoy.
Ready to build your book of masterpieces? Get started so you can receive your keepsake box and get the ball rolling!
Get Started with a Hardcover Book